
A dead key is one which does not immediately display anything when a user types that key. In the picture above, you see three rows of dead key panels. Each panel has a blue arrow in the middle, a label to the left, and another to the right. The label on the left displays the sequence of keys that a user will type; the label on the right shows the output that will echo if the sequence is fully typed. ELK allows any length of input and output sequences, although for most applications, sequences more than one or two characters in length will be confusing and not very practical.
The above picture shows dead key sequences used by those writing in the Secwepemc language. The single quote and the slash are dead keys. For example, if a user types a single quote followed by typing the m character, an m with a accent above displays. You see this sequence in the picture above in the rightmost column of the first row. Its dead key panel shows 'm to the left of the blue arrow, which is the dead key sequence users type. The label on the right shows an accented m, which is the corresponding output echoed.
To create a new dead key sequence, click on the Add sequence button. You will see a new dead key panel appear at the end of the table of dead keys. One such sequence appears in the bottom right column of the picture above.
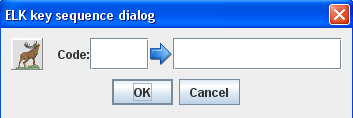
After clicking on the add sequence button, then click on the dead key panel to get the dialog shown (left or above on small screens). You can then type the sequence of keys that make up the dead key sequences. For example, you can type 'm to create the sequence we described above. In the right text box, you can, if you wish, type the characters to output and use unicode, if necessary. The format for entering unicode is the ampersand character, followed by #x, the hexadecimal code, and then a semicolon. (For example, m followed by ̓ will correspond to the accented m used in Secwepemc writing.)
There is an easier way to directly insert glyphs into dead key panels without using the dialog. Click on the desired glyph in the font display, and with the mouse pressed, drag it over the dead key panel and then drop. It will appear in the label to the right of the blue arrow. If the dead key output contains multiple characters, you can position the drop to insert glyphs in the middle of the sequence.
To modify the information in a dead key panel, just click on it to open the dead key dialog. You can then revise the information anyway you wish. All of the copy/paste/backspace features that you would expect are active. If you want to delete a dead key panel, simply click, and with the mouse depressed, drag it over the remove button and release. This action will remove the dead key panel from the table. You can also reorder the display of panels. Click on the one you want to move, and with the mouse pressed, drag it to the desired position in the table. When you release, it will appear at the desired place. Note however, that when you import, the ordering will be sorted alphabetically by dead key sequence.